The article is about a DIY project that will help you create the perfect homemade belt driven ceiling fans. In this article, you’ll learn how to build your own homemade belt driven ceiling fan with a few different options for size and style.
Ceiling fans are an integral part of many homes – but they don’t have to be a hassle. Some home improvement brains decided to design their own belt-driven ceiling fan, and they’ve given us some great information on how to build one. Read this article to find out the best way to do it!
What is a Belt Driven Ceiling Fan?
Belt driven ceiling fans are a great option for those who want to save money on their energy bill. They’re also a great choice if you have a tight space because they don’t require a lot of room. Plus, they’re incredibly easy to install. Here are some tips on how to install a belt driven ceiling fan:
1. Measure your ceiling height and select the right blade size for your fan.
2. Cut the belt or chain to the correct length.
3. Install the blade by screwing it into the hub and tightening it with the screws provided.
4. Connect the chain or belt to the motor and toggle it between “in” and “out” positions to test it out before securing it in place with screws.
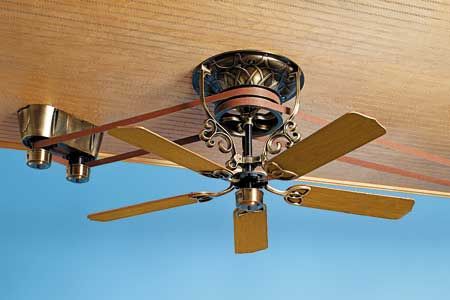
A belt driven ceiling fan is a great way to cool down your home without having to use air conditioning. They are easy to operate and can be set to rotate in any direction. You can also control the speed of the fan with the remote. Belt driven fans are usually less expensive than other types of fans, making them a cost-effective option.
How to Make a Belt Driven Ceiling Fan
There are many ways to make a belt driven ceiling fan, but the easiest way is to use a regular light switch. Follow these steps:
1. Remove the light fixture from the ceiling.
2. Strip away any insulation from the wires with a wire stripper or a knife.
3. Twist each wire around a bolt on the underside of the light fixture, making sure that the black (positive) and white (negative) wires are twisted together. Then screw the bolt back in place.
4. Strip away any insulation from the motor end of the belt drive sprocket with a wire stripper or a knife, then twist each wire around a bolt on the motor end of the belt drive sprocket, making sure that both black and white wires are twisted together (the blue wire should also be twisted around one of these bolts). Then screw these bolts back in place.
5. Attach one end of each belt to one of the sprockets on the motor end of the belt drive, making sure that both ends of each belt are attached tightly (you may have to use pliers to do this).
6.Attach the other end of each belt to an appropriate outlet box on your wall (make sure that you match up colors when attaching belts).
7. Turn on your power and watch as your fan starts spinning!
How to Make Your Own Motor
Are you tired of buying those expensive ceiling fans that are just not up to your standards? Maybe you’re sick of the noise they make or the fact that they tend to break down quickly. Well, here’s a great way to make your own belt driven ceiling fan for a fraction of the cost! All you need is some woodworking skills and a few pieces of hardware.
In this tutorial, we’ll show you how to build a basic wooden ceiling fan frame. You’ll need:
-1 sheet of plywood (1/2″)
-1 sheet of MDF (medium density fiberboard), or other hardwood product
-6 L-shaped brackets, 1″ in height x 3/4″ wide x 1″ deep
-8 screws, 1 1/4 inch long
-1 wire wheel brush
-Paint or stain of your choice
First, cut the plywood into four equal boards. This will be the base for your fan frame. Then, measure and cut the MDF to fit snugly around the edges of each board. To do this, first trace around each board using a pencil then use a jigsaw to cut out the shape. Make sure to sand all the edges before painting or staining so they look smooth and professional! Once everything is finished sanding and painting, it’s time to assemble your fan!
The Pros and Cons of a Belt Drive
Belt driven ceiling fans are one of the most popular types of home ceiling fans. They’re cheaper to operate than other types of ceiling fans, and they’re also less likely to require maintenance. However, there are a few cons to note when considering a belt drive fan.
First, as mentioned earlier, belt drives are less expensive to operate than other types of ceiling fans. However, this comes with a trade-off: belt drives are typically not as powerful as other types of ceiling fans. Additionally, they tend to be louder than other types of fans, which may not be ideal if you’re looking for a quiet bedroom or living room fan.
Second, belt drives are less reliable than other types of ceiling fans. This is because the motor is located in the center of the fan rather than on the perimeter like with traditional blades, which can lead to wear and tear over time. In addition, belt drives can be more prone to breaking down due to vibration and interference from other objects in the room.
Belt driven ceiling fans are a great option for those who want to save money on their electric bill. However, there are some things to consider before making the switch.
The pros of belt drive fans include:
-They are cheaper to operate than traditional ceiling fans.
-They require less maintenance since they do not use any motors or gears.
-They can be more efficient in terms of energy usage since they do not require as much power to turn as a traditional fan.
The cons of belt drives include:
-They may be less powerful than traditional fans.
-They may be louder than standard models.
-They can be more difficult to install since they require a bit more work than standard fans.
Choosing Materials for Your Project
When you are considering the materials for your homemade belt driven ceiling fan, it is important to think about what will work best for your home and room. Many people choose to use a wooden dowel as the shaft of their fan, because it is simple to make and looks great in any room. You can also choose to use a PVC pipe or rod as the shaft, but these are more difficult to create and may not look as good in your home. When choosing a material for your fan, it is important to consider the airflow that it will provide. Fans with a large surface area will allow more air through than smaller fans, so if you want a powerful fan for high ceilings, choose a larger fan with many blades. If you only need a medium sized fan for lower ceilings or an area where airflow is not as important, choose a smaller fan with fewer blades.
When you’re considering materials for your homemade belt driven ceiling fan, there are a few things to keep in mind. First, think about what kind of look you’re going for. Do you want a traditional look with lots of metal and wood or something more modern?
Next, think about what kind of fans you’ll be using the ceiling fan for. If it’s just for occasional use in a small room, then a cheaper model may be fine. But if you plan on using the fan often in larger rooms, then you’ll need to invest in a better one.
Finally, think about how much space you have above the fan. If the ceiling is high enough, then a smaller fan will work just fine. But if the ceiling is low or doesn’t extend very far above the fan, then you’ll need to choose a bigger model.
Finishing and Assembly
There are a few things you’ll need to assemble your belt driven ceiling fan. You’ll need a belt, a power drill, screws, and a screwdriver.
To assemble the fan, first put the belt on the spindle. Make sure that it’s tight against the wheel. Then use the screws to attach the wheel to the spindle. Finally, use the screwdriver to attach the blade to the wheel.
Now you’re ready to install your fan. Just attach it to your ceiling using the included mounting brackets and wires. Be sure to test your fan before installing it for real by turning it on with the switch.